


Available Maps — Season 1
In this first season, the available maps cover the progression from level 1 to level 380. The locations are organized from the weakest to the strongest, following the access level and the difficulty of the monsters found in each region.
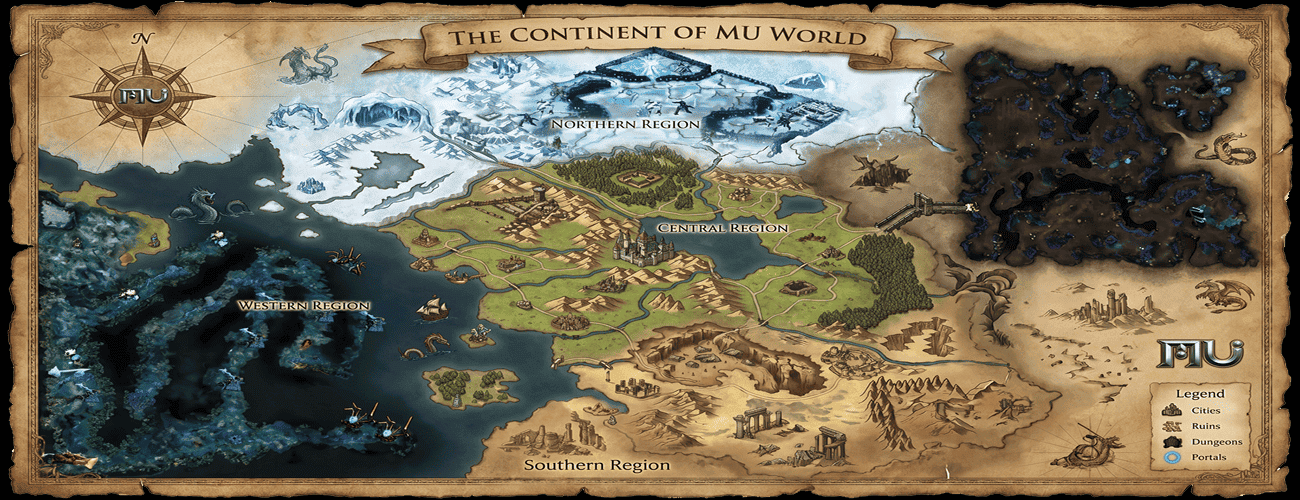
Use this list as an evolution route. As the character gains strength, progress to higher tier maps.
Starting Point
- Starting City: Trivalis.
- Noria: unavailable this season.
- Elbeland: unavailable this season.
- Kalimas: unavailable this season.
Cities and Hubs
These locations function as cities, safe areas, markets, or special access zones.
| Location | Level | Move | Function |
|---|---|---|---|
| Trivalis | 1 | Free | Starting city and location of main NPCs. |
| Crywolf | 10 | Free | Fortress and Crywolf event area. |
| Loren Deep | 10 | Free | Special access area. |
| Loren Market | 1 | 10,000 Zen | Market and player trading. |
Beginner Tier — Level 10 to 50
Maps recommended for the beginning of evolution, when the character still uses basic equipment and has few resources.
| Map | Access Level | Move |
|---|---|---|
| Devias | 10 | 2,000 Zen |
| Devias 2 | 10 | 2,500 Zen |
| Devias 3 | 10 | 3,000 Zen |
| Devias 4 | 10 | 3,500 Zen |
| Dungeon | 20 | 3,000 Zen |
| Dungeon 2 | 25 | 3,500 Zen |
| Dungeon 3 | 30 | 4,000 Zen |
| Lost Tower | 40 | 5,000 Zen |
| Lost Tower 2 | 40 | 5,500 Zen |
| Lost Tower 3 | 40 | 6,000 Zen |
| Atlans | 50 | 4,000 Zen |
Intermediate Tier — Level 50 to 160
This range focuses on important maps for evolution, obtaining equipment, and completing various quests.
| Map | Access Level | Move |
|---|---|---|
| Lost Tower 4 | 50 | 6,500 Zen |
| Lost Tower 5 | 50 | 7,000 Zen |
| Lost Tower 6 | 70 | 7,500 Zen |
| Lost Tower 7 | 70 | 8,000 Zen |
| Atlans 2 | 80 | 4,500 Zen |
| Atlans 3 | 90 | 5,000 Zen |
| Tarkan | 130 | 8,000 Zen |
| Aida | 150 | 8,500 Zen |
| Tarkan 2 | 160 | 8,500 Zen |
| Icarus | 160 | 10,000 Zen |
| Kanturu Ruins | 160 | 9,000 Zen |
| Kanturu Ruins 2 | 160 | 9,000 Zen |
Advanced Tier — Level 280 to 380
Advanced maps are intended for characters with stronger equipment, defined builds, and greater survival capacity.
| Map | Access Level | Move |
|---|---|---|
| Karutan | 280 | 13,000 Zen |
| Vulcanus | 300 | 15,000 Zen |
| Kanturu Remain | 300 | 12,000 Zen |
| Acheron | 300 | 50,000 Zen |
| Aida 2 | 380 | 8,500 Zen |
| Kanturu Ruins Island | 380 | 15,000 Zen |
| Karutan 2 | 380 | 14,000 Zen |
| Raklion | 380 | 15,000 Zen |
| Swamp of Calmness | 380 | 15,000 Zen |
How to Move
- Use the command or the Move menu to travel to the desired map.
- The Zen amount will be deducted according to the table for each destination.
- Each map is unlocked only when the character reaches the minimum access level.
- Free maps do not consume Zen during travel.
How to Choose the Ideal Map
- The access level represents a reference for the strength of the monsters, but does not guarantee that the character is prepared.
- If you are taking too much damage or taking too long to defeat the monsters, return to a map from the previous tier.
- If the monsters are being defeated quickly and without risk, advance to a stronger map.
- Also consider the respawn, the distance between the monsters, and the cost of potions when choosing the best evolution location.
- An efficient route combines experience per hour, safety, and low resource consumption.